How to Install a Door Lock: Step-by-Step Guide 🔐
Installing a new door lock is one of the most achievable DIY home repairs—it requires basic tools, modest mechanical skill, and about 30 minutes to an hour. Whether you're replacing an old lock, upgrading security, or installing one in a new door, understanding the process helps you decide whether to tackle it yourself or call a professional.
Understanding Lock Types and What You're Installing
Before you begin, know what kind of lock you're installing. The most common residential options are knob locks (lock built into the doorknob), deadbolts (separate locking mechanism), and lever handle locks (commercial-style handles). Each installs slightly differently and requires different sized holes.
Knob and deadbolt locks typically come as single-cylinder (locked from outside with a key) or double-cylinder (locked from both sides with a key). Some newer models include smart features—keypads, fingerprint readers, or app-based controls—but the basic installation framework remains similar.
Check your door's existing holes before purchasing. Standard interior doors use 1⅜-inch thick doors; exterior doors are usually 1¾ inches. The lock packaging will specify compatibility.
Tools and Materials You'll Need
You don't need many tools:
- Screwdriver (usually Phillips and flathead)
- Drill with bits (if cutting new holes)
- Hole saw (typically 2⅛-inch for the main hole, 1-inch for the bolt hole—often included in lock kits)
- Chisel (for mortising the strike plate)
- Measuring tape and pencil
- The lock itself and any included hardware
- Level (helpful but optional)
Most lock kits include installation instructions specific to that model, plus necessary screws and sometimes a cardboard template for marking hole locations.
The Basic Installation Process
Step 1: Prepare and Mark
Lay out the lock components and read the instructions thoroughly—details vary between brands. Use the provided template (or measure 36–40 inches from the floor for standard height) to mark where holes go on both the edge and face of the door.
If you're replacing an existing lock and the holes align, skip to Step 3. If you're cutting new holes, this step is crucial for alignment.
Step 2: Drill the Holes
If new holes are needed, drill the large hole (typically 2⅛ inches) through the door face first, from the outside in. This prevents splintering on the visible side. Then drill the smaller edge hole perpendicular to it, using a level to ensure it's square.
Take your time here—crooked holes mean the lock won't operate smoothly or sit flush.
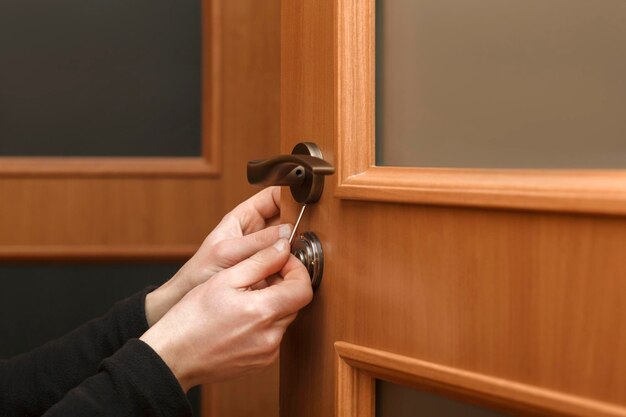
Step 3: Install the Interior Lock Body
Insert the lock cylinder (the part with the keyway) into the front hole. From the inside, slide the lock mechanism's interior assembly through the edge hole and align it with the cylinder. Tighten the connecting screws; the lock should operate smoothly with no binding.
Step 4: Attach the Interior and Exterior Plates
Most locks include interior and exterior rose plates (decorative rings) that cover the gaps around the lock. Secure these with the provided screws, ensuring they sit flush against the door.
Step 5: Install the Strike Plate
The strike plate is the metal bracket on the door frame that the bolt enters. Close the door and mark where the bolt lands on the frame. Install the strike plate so the bolt slides into its opening smoothly.
If the bolt doesn't align with the existing strike plate hole, you may need to mortise (chisel out) a shallow recess in the frame so the plate sits flush. This prevents the door from being pushed open before the bolt fully engages.
Step 6: Test and Adjust
Lock and unlock the door several times from both sides. The bolt should extend and retract smoothly. If it's sticking, the door may be slightly out of square—adjusting hinges or shims can help. If the bolt doesn't catch in the strike plate, the alignment needs adjustment.
Variables That Affect Your Installation
| Factor | Impact |
|---|---|
| Door material (wood, metal, fiberglass) | Affects how easily holes drill; metal requires different bits |
| Existing holes | Saves 15–20 minutes; misaligned holes complicate installation |
| Lock type (knob, deadbolt, smart lock) | Different assembly sequences and hardware requirements |
| Door condition | Warped or swollen doors may need planing; soft wood splinters easily |
| Strike plate alignment | Misalignment means the bolt won't catch; mortising may be needed |
When to Call a Professional
You might consider hiring a locksmith or handyperson if:
- Your door is significantly warped or damaged
- You're installing a smart lock and want to ensure wiring or battery backup is handled correctly
- The existing holes are severely misaligned and drilling new ones would weaken the door
- You're uncomfortable using a drill or mortising tools
- Your door frame is damaged and needs repair before the strike plate installs properly
Key Takeaways
Door lock installation is straightforward when holes align and the door is in decent condition. The process centers on three main tasks: drilling (if needed), assembling the lock body, and positioning the strike plate so the bolt catches reliably. Your specific situation—whether you're working with an existing hole, a new door, or a non-standard setup—will determine how straightforward the job is and whether a professional makes sense for your comfort level and timeline.